How to Install the Rubber Ducky Scooter Accessory 🦆⚙️Updated a month ago
The Rubber Ducky is a fun scooter accessory that doubles as a quirky light-up decoration. This guide walks you through what’s included in the kit and how to install it securely on your scooter’s handlebars.
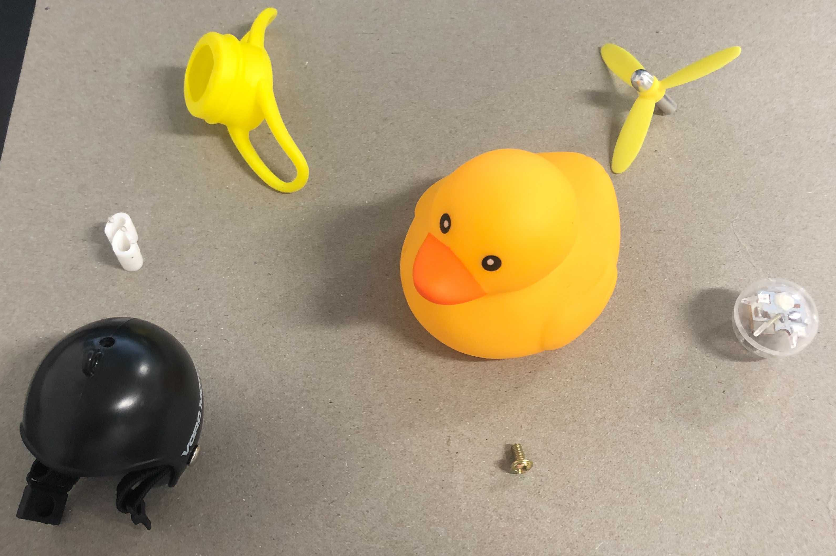
🛍️ What’s in the Bag?
Rubber Ducky
Helmet
Bottom cap
Propeller
Light-up ball
S-shaped plastic piece
Small screw (M3×6mm)
💡 Step 1: Add the Light-Up Ball
Insert the light-up ball into the rubber ducky from the bottom opening.
Ensure it stays seated properly inside the duck.
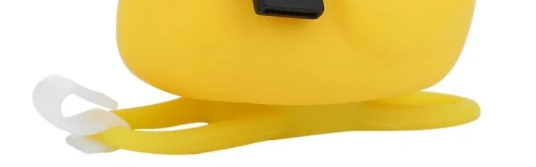
⚙️ Step 2: Prepare the Bottom Cap
Attach the S-shaped plastic piece to the bottom cap.
Tip: Start with the thinner end—it’s easier to secure first.
Insert the bottom cap into the hole at the base of the duck.
Ensure the handles are facing outward and the cap is snug.

⛑️ Step 3: Assemble the Helmet & Propeller
From inside the helmet, place the M3×6mm screw through the top hole.
Position the propeller on top of the screw.
Tighten by turning the propeller clockwise until secure.
Place the helmet on the duck, making sure it sits correctly so the duck “can see.”

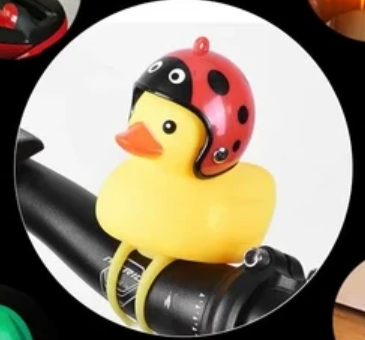
🛴 Step 4: Mount the Duck on Your Scooter
Position the ducky on the scooter’s handlebar.
Wrap the bottom cap slings around the bar.
Use the S-shaped piece to lock the slings together.
This keeps the ducky firmly attached and prevents it from slipping off.
✅ Final Check
Confirm the duck lights up.
Make sure the helmet and propeller are secured.
Double-check that the bottom cap and slings hold the duck steady on your handlebar.
Now your scooter has some extra personality—and visibility—with your newly installed Rubber Ducky! 🦆✨